Example 11: Boiler and Electricity cards
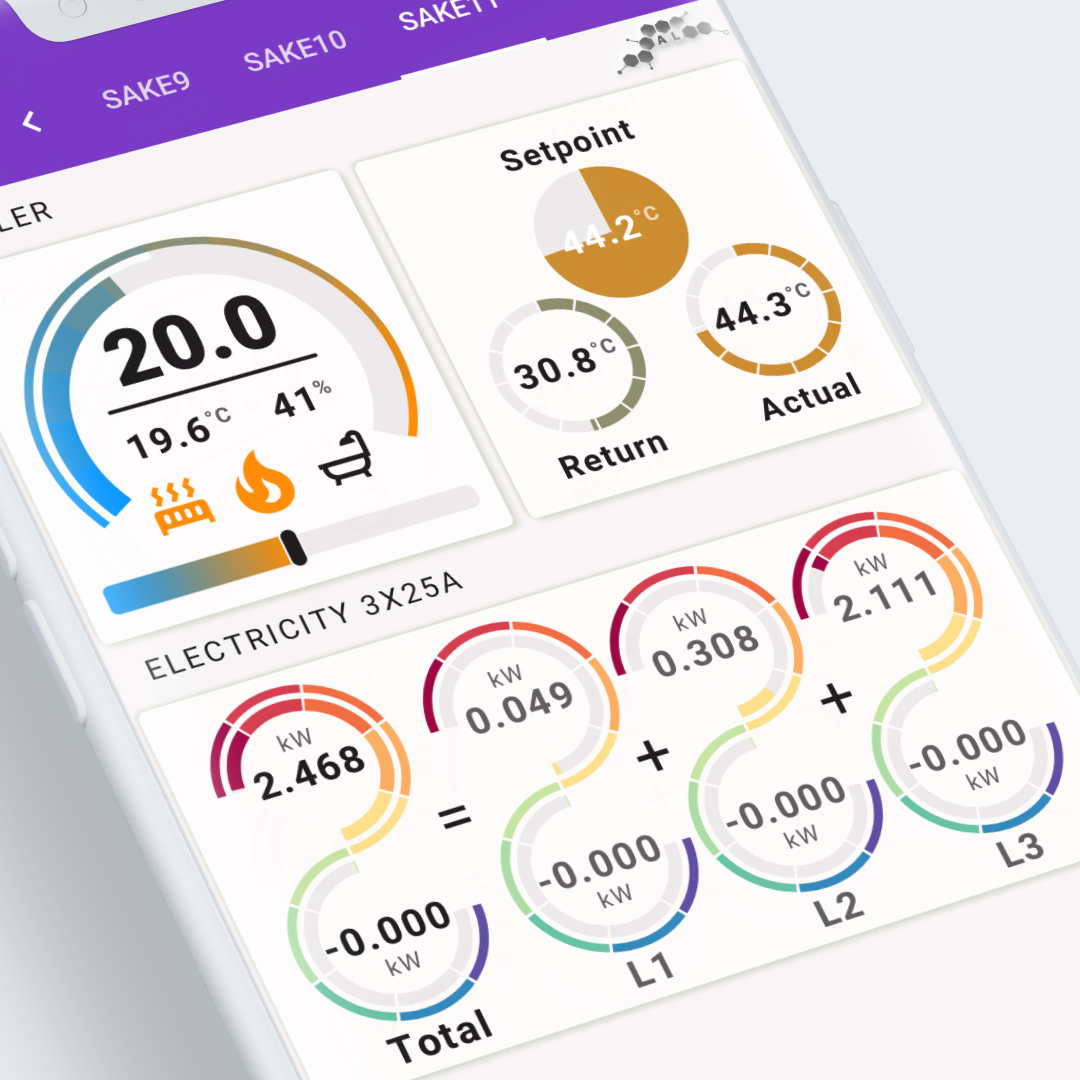
 Light example using Home Assistant Material 3 theme c11 (Purple)
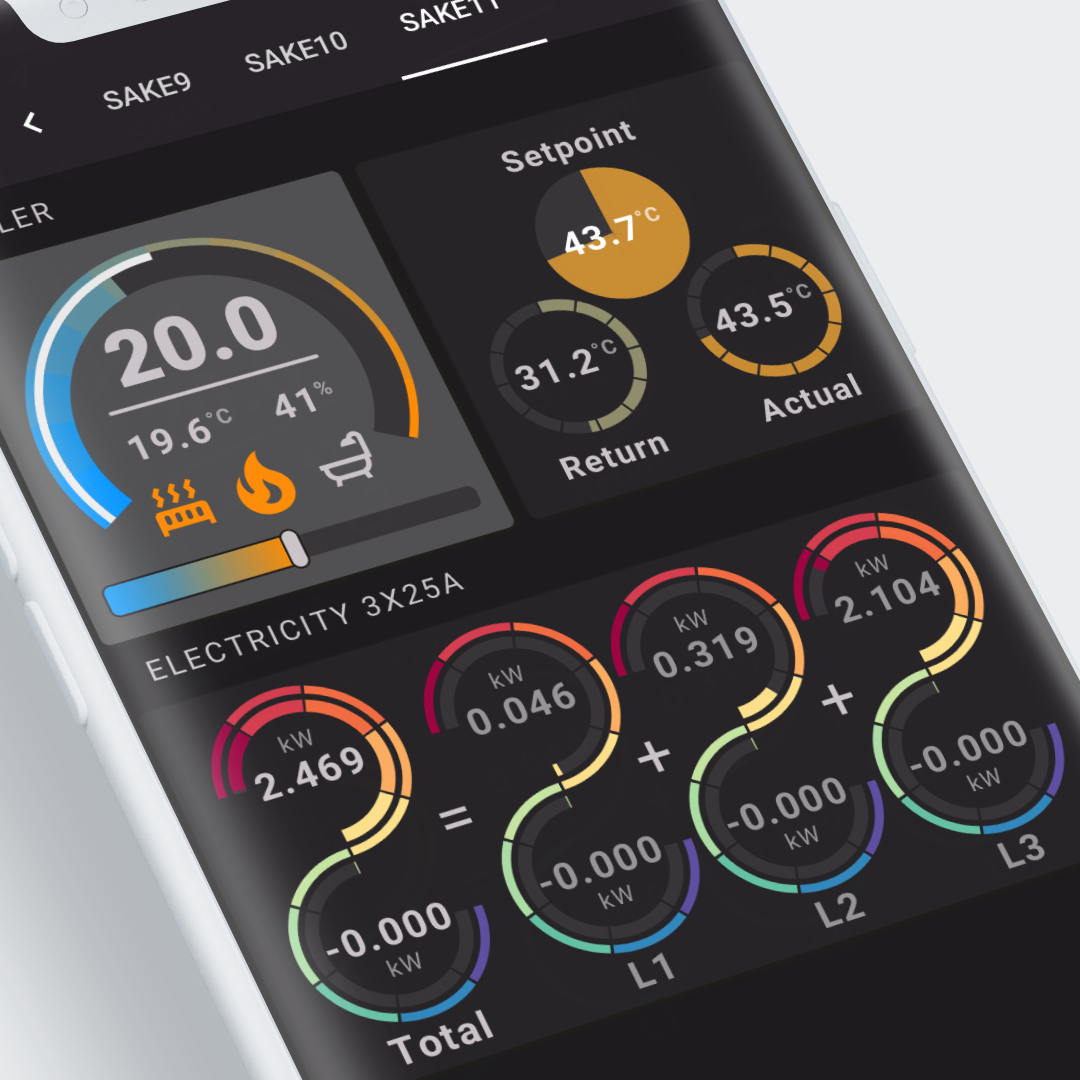
 Dark example using Home Assistant Material 3 theme c11 (Purple)
Visualization
This visualization shows colorful boiler and electricity cards with possibly very "Dutch/European" integrations.
The second card has the data from my 3 phase smart meter. My 4 kWp solar system is disconnected, so you don't see any returned power.
Boiler
It shows a thermostat with some extra data (heat/hot water active) and the boilers' setpoints and actual measured temperatures.
The thermostat card uses two overlayed segmented arcs: - One (with scale) for the actual room temperature measured by the thermostat - One (white, no scale, superimposed on previous segarc) for the setpoint.
You can see the setpoint in the screenshot: the room temperature is 19.6 degrees celcius and the setpoint is 20.0 degrees celcius. The latter one is a smaller segarc.
Electricity
The electricity card shows my 230V/3x25A smart meter data where the upper segmented arc shows the delivered (from the grid) electricity, and the lower part the returned (to the grid) electricity from for instance a solar system.
In my case, my 4 kWp solar systems converter delivers up to 3680 W (230V / 16A) and is connected to a single phase (L3).
Used Home Assistant Integrations
- Boiler: OpenTherm Gateway integration. I'm using both a MQTT based integration and the official OpenTherm Gateway integration.
- Electricity: DSMR smart meter readings using the separate DSMR Reader application, ie the DMSR Reader integration which uses MQTT to transfer the data to Home Assistant.
How to make it work in your own installation
Both boiler and electricity are quite specific, but give you a nice idea what is possible to control a thermostat for instance.
Boiler (top two cards)
Required Home Assistant Integrations
OpenTherm Gateway integration
Required Home Assistant Entity Changes
The OpenTherm Integration uses a name for the thermostat, in my case, this is calenta. If you also use the OpenTherm Integration, replace calenta with your own installation name. In other cases, you should be able to customize entities for your own thermostat/boiler configuration.
The entities for the first card of the boiler:
- The first entity is the current room temperature (
sensor.room_temp_thermostat_calenta) - The last is just a random Zigbee sensor showing the current humidity inside (
sensor.studym_iaq_humidity) - The other sensors are to control the thermostat (
room_setpoint_thermostat_calenta) using the slider and the boiler active / flame / hot water requests.
1 2 3 4 5 6 7 8 9 10 11 12 13 14 15 16 17 18 19 20 | |
The slave_flame_on entity is used to show a white background (using a rectangle) of the boiler is on
1 2 3 4 5 6 7 8 9 10 11 12 13 14 | |
Electricity
Required Integrations
- DMSR Reader integration
Required Entity Changes
If you are using the DSMR Reader integration, no changes are necessary for the electricity part.
The DSMR Reader integration generates generic sensor entities:
1 2 3 4 5 6 7 8 9 10 11 12 13 14 15 16 17 18 19 20 21 22 23 24 25 26 27 | |
Interactions
- The slider for the thermostat will set the temperature using the
climate.set_temperatureservice for myclimate.calentaboiler entity in 0.5 degrees Celcius steps and a range between 17..23 degrees Celcius. - All tools support by default the "more-info" dialog once clicked.
View and Card Configuration
Lovelace view
| file | location | included from |
|---|---|---|
view-sake11.yml | /lovelace/views | sak-examples-dashboard.yaml |
Decluttering templates
None.
SAK templates
This view uses a template for the electricity card.
| name | file |
|---|---|
toolset_electricity_delivered_returned | toolset-electricity-delivered-returned-template.yaml |
The four parts therefore can use the same definition:
1 2 3 4 5 6 7 8 9 10 11 12 13 14 15 16 17 18 19 20 21 22 23 24 25 26 27 28 29 30 31 32 33 34 35 36 37 38 39 40 41 42 | |